Showing posts with label Other than LOs. Show all posts

Sunday, March 06, 2016

A little Baby Card

I am so out of touch, this card took me all morning! But I am pleased with the results.

Quote Stamp from PSX, background baby stuff from D.O.T.S. The ribbons on the tag fixed with that special stapler (I forget what it is called!), tag background done with alcohol inks, fabric flowers from local market, affixed with a hot glue gun. Border hand drawn with white gel pen, studs are matte silver, and I used a deckle scissor to cut the edge of the quote. All cardstock from Clubscrap.

Sunday, June 14, 2015

How to Make Paper Bows Kirigami

Kirigami is Origami with some cutting. These bows are beautiful!!


Below is the first bow I made. Points to note - I used printed scrapbooking paper. Something lighter would be better. The square bit at the centre should have been a little bigger. Because it is so small, i had trouble inserting the points inside. So I had to glue them down.


Monday, June 08, 2015

Tag book

Many (at least 10 I think) years after I received a wonderful tag book from a friend, I decided to make one of my own. The book binding classes I took also helped. Everything, down to the paper used to cover the tag book, is handmade. It took me 3 weekends to finish but it was so good to be able to get back to crafting.


Saturday, June 19, 2010

Covering an album

My first attempt covering an album - the pink part was done already. I just stitched the green part, applied the label, embroidered the word 'travel' and then glued it all together. Surely my next attempt will be better ;)

Wednesday, May 12, 2010

Double Happiness card

My employer is getting married. And so finally, after a break of more than two years, I made a card. Quite enjoyed it too! I used a 'Wild Card' template from Wordsworth Stamps. Troublesome sending these cards by mail so I usually use them when I know I will be hand delivering the card. This card will contain cash - the most appreciated form of gift for any occasion for the Chinese. Any number with 8 is good but best to avoid any 4s.

I made the background using a Club Scrap stamp of two small bamboo leaves and tone on tone. The fish are cut out from a Stampendous stamp. Double Happiness is by Hero Arts. The silver embossed Kanji writing is by Sunday International - one of my most used stamps I believe :) All papers are from Club Scraps Fruit & Vine kit. Fish & Double Happiness are embossed using Chinese Red EP. I wish I had detail gold embossing powder on hand. It (gold and red) would have been more appreciated than silver and red. But after sitting there for a while all my gold ep has gone bad. Not only does it stink to high heavens, when embossed it looks almost black. None of the other embossing powders have deteriorated in this manner. And since the local RS store is quite a distance away, silver it had to be.


Tuesday, March 17, 2009

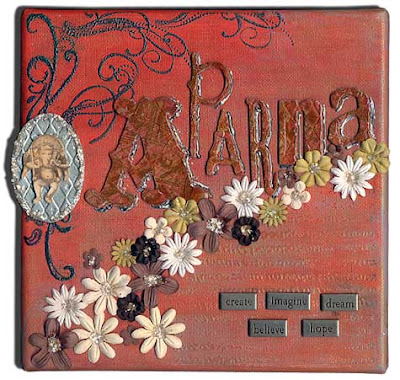
Canvas Art

This is the last article I will be writing for S.S. Reflections. Sadly the current global economic downturn has taken its toll on us, too. I shall miss the challenge of actually doing something interesting enough to write about every month. These articles also helped me to stay in touch with my scrapbooking – something that had become increasingly difficult as my work got more time consuming!

A coincidence – my last project for SSR is a name plaque that I made to hang on my desk in the office where I started a full time job in February.

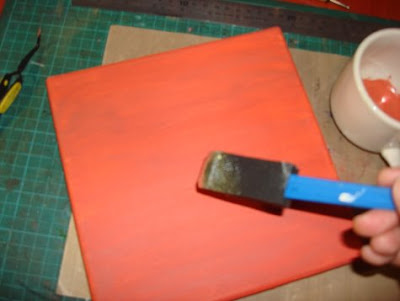
Start with a blank mounted canvas. Using a sponge brush, cover the whole canvas with an acrylic colour of your choice. I used poppy with a very few drops of sage green. I made sure to brush only in one direction so the canvas had horizontal strokes. I also coloured the outside edges so that when the finished canvas is hung on the wall, no white is visible.


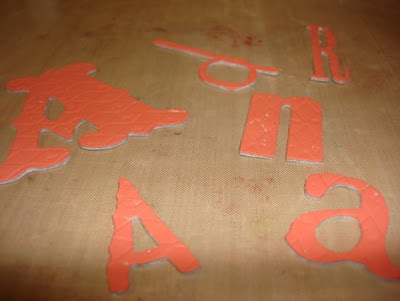
The letters are Tim Holtz grungeboard. I coloured them using the same poppy acrylic paint.


Using brown dye ink and a sponge tip, colour the edges of the letters.
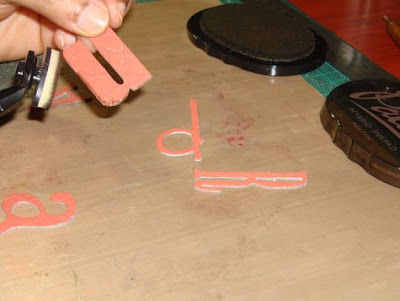


Slightly smudge the brown colour onto the front of the letters.Place all the letters close together, and using a large background stamp and distress ink, stamp the image onto the letters. Because this grungeboard has a pattern, I had to press down quite hard with my stamp to get a clear image.
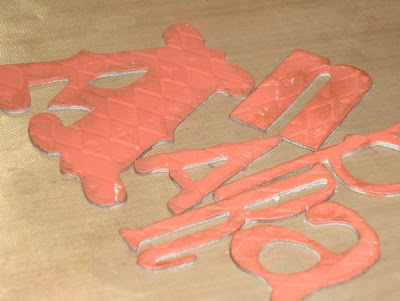


Emboss with distress embossing powder.
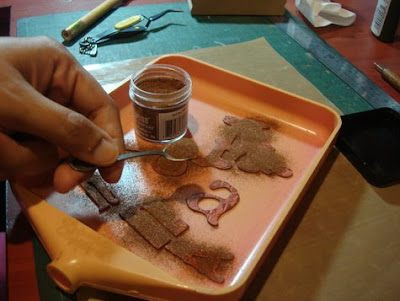


This is how the image will look on the letters after stamping and embossing.
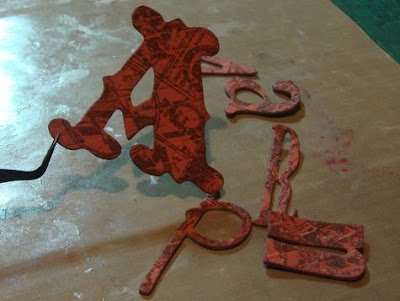


Mist the letters with water.
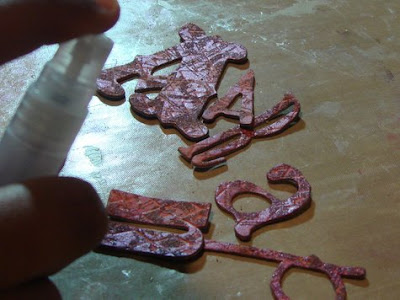


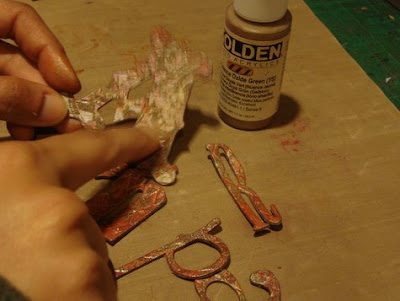
I found my finger the best tool for this next step. I put some Interference green acrylic ink on the Teflon sheet and then lightly rubbed the paint onto the letters.


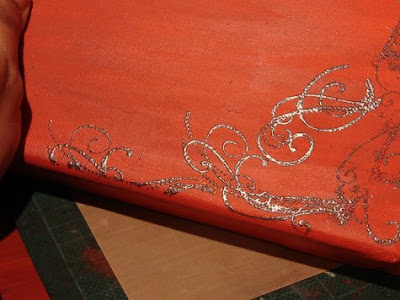
Next, I stamped and embossed some swirly patterns onto the canvas. I used regular embossing ink and EP, but I had to take some care when applying the stamp because not all parts of the canvas are wood backed and I need to apply even pressure to the whole image. Do a few dry runs (without inking your stamp) to see how you can best get even pressure onto all parts of the canvas on which you wish to stamp.

An alternative to this is drawing a design freehand using an embossing ink pen and then embossing with EP. I used this method to touch up the parts of the stamped design that did not get transferred onto the canvas.


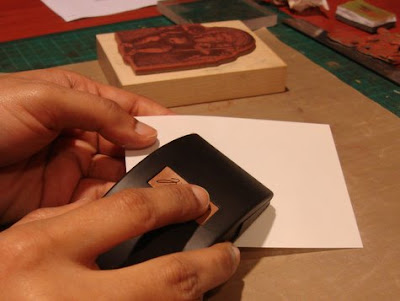
Take a cream coloured piece of shrink plastic and sand one surface well.


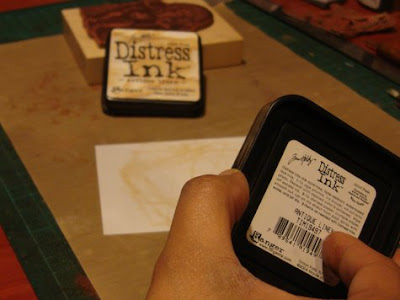
Use an ink that can be heat set and rub lightly all over the sanded surface. Use a tissue, or something similar, to blend the ink as evenly as possible all over the surface. Use a light ink and a light hand. Keep in mind that when the plastic shrinks the colours will intensify.


Stamp the image onto the shrink plastic using a sepia toned ink. Again, do not use a very dark ink because the colour will intensify when the image shrinks. Cut out the image, if necessary.
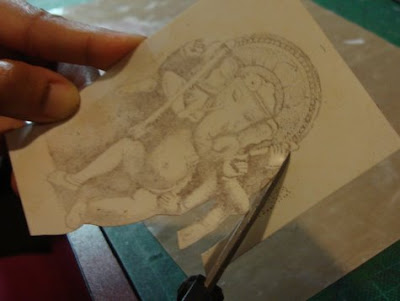


Heat plastic to shrink it!
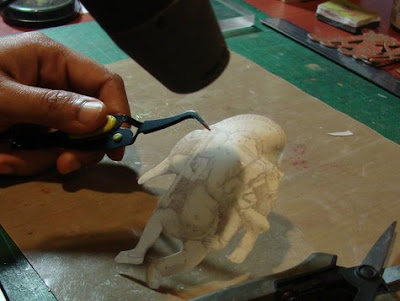


Do not worry if the shrink plastic gets all twisty – keep heating from both sides and you will find that it automatically straightens out when it has shrunk to its minimum.
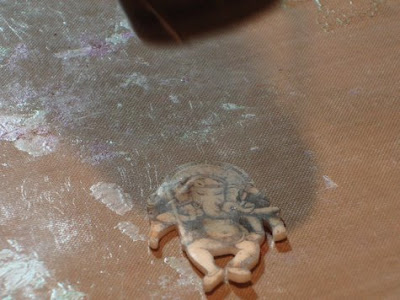


Cut out a frame for your shrink plastic image from grungeboard. Colour it with an acrylic paint. I used an interference silver.
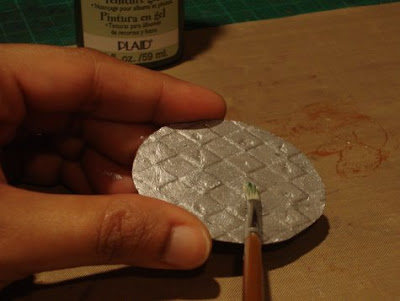


I applied a second layer of green sage gel paint to give the frame a greenish tinge.
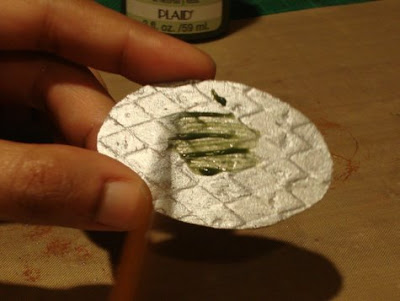


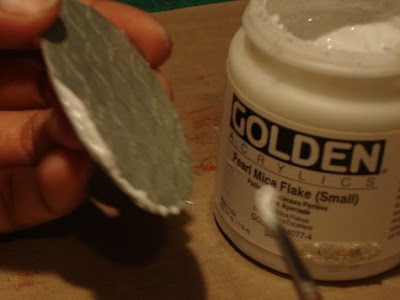
A thin line of pearl mica flakes around the edge makes an interesting border.


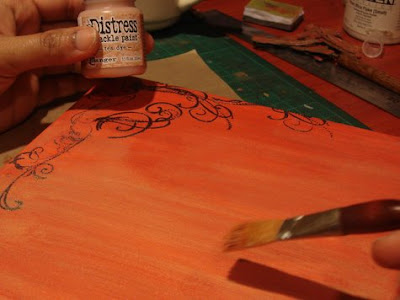
I tried some Distress crackle ink in Tea Dye but did not like the effect – too opaque and it did not look good with the poppy. So I wiped it off, but a few streaks of the paint remained. I liked the look of it.


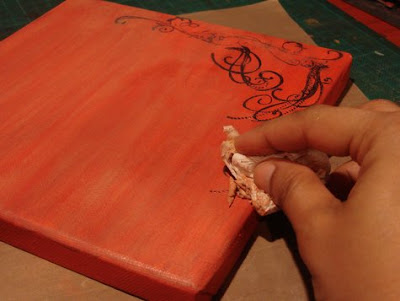
Using a tissue, wipe off any paint on the embossed design.


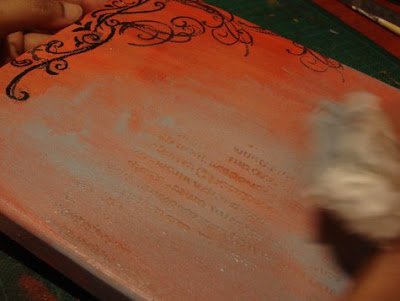
Use a background stamp like a script or maybe music score stamp and emboss on the opposite corner. Use an ink similar to the acrylic background and clear embossing powder.


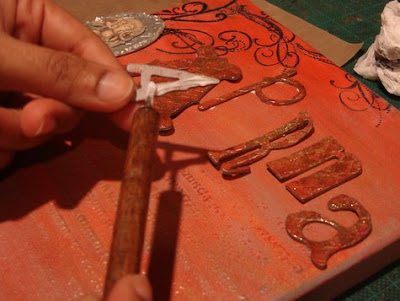
I applied a thick layer of glossy stuff on the letters and left them to dry overnight. Then, using tacky glue, I stuck the letters onto the canvas.


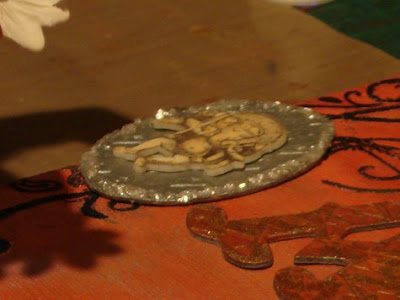
I then stuck the shrink plastic image onto the oval frame and then onto the side of the canvas.


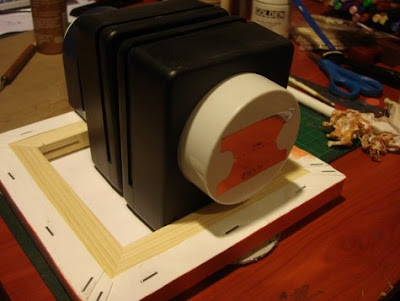
Then I turned the canvas over and weighed it down and left to dry for a while so that the letters and the oval image are fixed well onto the background.


Using the same tacky glue I applied some flowers. The same pearl mica flakes in small dots made for sparkly flower centres.
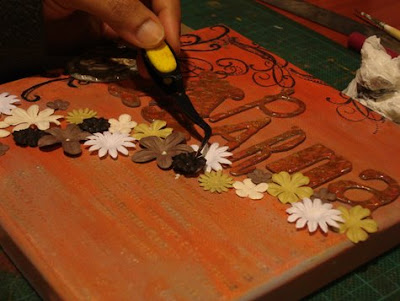


A little bit of dark grey liquid pearl to create a shadow effect on the letters.
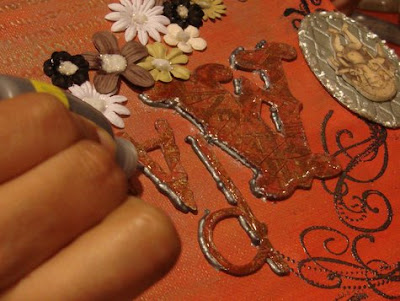


I used a Japanese paper punch to make a few holes in the canvas. Take care if you need to make the hole where the canvas has no wood backing. Prick it with a needle to indicate the position and then use the punch from the reverse. There is less possibility of the canvas tearing.
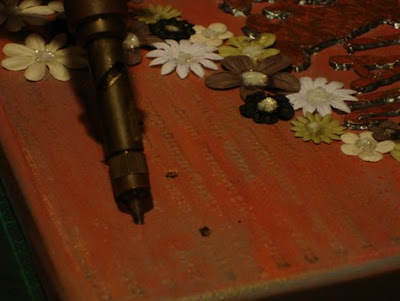


If there is wood behind you may need to pound the metal a bit harder. In any case, I used glue to help stick the metal well onto the canvas.
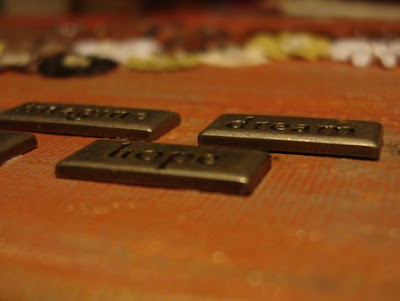

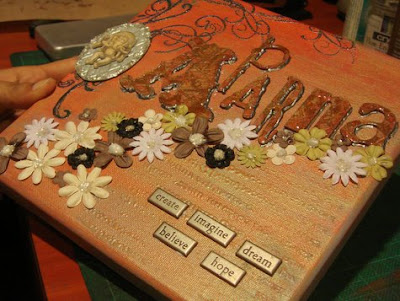
And here it is – for my desk – my name, a little shrine to the Hindu God Ganesha and some words to keep me motivated at work!


Monday, February 09, 2009

Christmas Cards

The following cards were inspired by Tim Holtz’ 12 tags for Christmas. The first tag uses a mask, so I decided I had to make it. But I did not have distress inks, grungeboard, stickles glitter and all the other little doo dads that Tim loves to use. I guess the following is an example in improvisation. Making do with what one has on hand.


I lined up three pieces of cardstock and laid the mask on all three. This way I would do everything just once and get three cards. I had no distress inks so I used my dye ink pads and tried some DTP. That did not please me very much so I switched to my trusted stippling method. Then I took off the mask, and because the negative image was so sharp, I stippled in some more colour to give the masked area a more blended in look. I stamped the music background.

For the letters, I used the negative of a chipboard alphabet as a stencil and cut out the letters from regular cardstock. I did not have any red stickles glue, so I used children’s glitter glue instead. The holly leaves are done with a punch. Since I had no grungeboard, the lamp post is stamped on handmade paper, the thickest ‘cardstock’ I could find.

  • Cardstock by Club Scrap
  • Street lamp stamp by Club Scrap
  • 'JOY' letters traced from the negative of FooFaLa chipboard alphabet
  • Musical mask by Tim Holtz
  • Inks used: Ranger Adirondacks Cranberry, Mushroom, Bottle & Lettuce
  • Letters coloured with Pinta Perla 'rouge' paint and then covered with Crayola red glitter glue.
  • Punched Holly leaves painted with leaf green 'Silk' paints from Stampa Rosa
  • Background musical stamp from Stampington
  • Yellow of street lamp coloured in with galaxy marker
  • Tuesday, December 23, 2008

    Blue Santa cards

    Blue Christmas cards - I wanted to try another colour for this batch - not just red & green. And I love the blue and silver combination. All the embossing is done with detail silver EP. The holly stamp used on the border is from Club Scrap. The postage stamps on the tags & the frame stamp in the middle is by Hero Arts. The frame actually has a little leaf image in the centre but I cut that out. Background Celtic lettering is by Judikins.

    Click to enlarge

    Thursday, December 04, 2008

    'Ox' cards

    Next year, according to the Chinese Zodiac Calendar, is the year of the Ox. So I can send Chinese New Year cards using this image. Also I am currently trying to find out if any of my friends (or their family members) were born in the following years: 1997, 1985, 1973, 1961, 1949, etc. The OX stamp image from Kodomo would make an excellent birthday card for these people. I have to take care though – the Chinese New Year is sometime in late January – early Feb. So someone born January 1962 could still be from the Year of the Ox.

    I have this beautiful origami paper that I have been saving for years. It seemed perfect as a background for the Ox. The image itself is very simply stamped and embossed in Chinese Red ink & EP on very thick black cardstock.

    A little fan using the same origami paper is the highlight of this card. I tied the base using a very fine gold thread. The gold curly things are Japanese Mizuhiki paper cords. Usually they are used for making ornamental knots which can be used in scrapbooks and cards to give an oriental touch. I like using the cords even without making the knots.


    Here the Ox is very simply stamped and embossed in Chinese red ink / EP on black cardstock. The cut out is then glued onto corrugated cardstock. The background was the fun bit. I stippled some tans and light browns onto a white piece of mulberry paper. Then, using a dark artprint brown colour, I stamped the kanji script. I dampened the edges and tore them. Always best to do this step last so you can see the stamped image on the frayed edges, too.

    The image on this card uses the reverse inking method. I inked a large leafy background stamp with black pigment ink. Then I ‘kissed’ the Ox stamp onto the inked leafy back ground. Then I stamped onto white cardstock and embossed with black detail EP. The door is another stamp and I have no idea what the little phrase says – something nice, I hope!

    Saturday, November 15, 2008

    Yesterday Remains

    The printed image is cut from a collage sheet by Altered by Design. The background is stamped with Ranger Adirondack ink in Lettuce and layered with green cardstock. Background stamp by Stamper's Annonymous. The paisley frame is painted with Luna Lights Red/Brown by Stamp Oasis. Gold ribbon from my stash. Sentiment stamp, from Club Scrap, is inked with Ranger Adirondack ink in Bottle.

    Wednesday, November 12, 2008

    Christmas Cards

    Christmas cards made with printed images from Altered by Design. Crafted for SS Reflections November issue. Click on the link for details on how to make the cards.