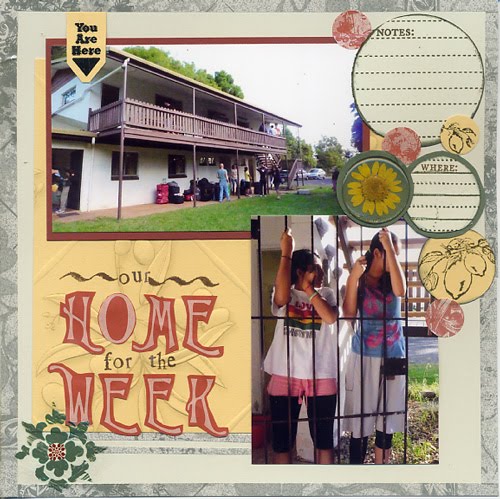
The dorms at Montville, and Lily and Riva just hanging out - how much fun was it just standing on a grill door like that and swinging back and forth? The place was verdant and the students spent a good part of their time outdoors. They also had to cook by themselves and here was the fun part. Lily is quite the gourmand but can just about boil an egg. So she had to eat whatever was dished up by a bunch of sixteen year old enterprising wanna-be chefs - including some terrible pasta. But when one is young, with friends and having fun everything is easier to adjust to.
This page is done with the Club Scrap Tuscany kit (paper, border stickers, letter stickers, lemon rubberstamp). Other elements are Art Warehouse journalling stamps, petal pebbles, rub-on (you are here) by 7 Gypsies and (fleur-de-lis pattern) by Fancy Pants. The small letter stamps are PSX. The wavy line on either side of 'our' is a stamp by Art Baker - the calligraphy set.
How to revive a dried up Rub-On
Now here is an update on those dried up rub-ons. Fancy Pants wrote back and though they were very polite and kind, basically they told me that they had never heard of a problem like mine before (so this is happening only to me? I have sheets & sheets of rub-ons from Creative Imaginations just hanging there, mocking my crazy shopping sprees), if I wanted a replacement I had to contact the vendor (ummm ... got this over two yeas ago so who remembers...) and not a hint of a solution (I mean the problem does not exist, right, so why would they have a solution!?!)
Anyhoo, if you find that your rub-on is stuck to the backing paper then this is not for you. Those rub-ons unfortunately will have to be written off. If however your rub on is still intact, just dried out, you can give this technique a try. Do not hold me to perfect results because I have done it just once till now. I have to do this experiment a few times before I can state that it really works. While I am trying it with my dried out rub-ons, perhaps you can give it a try with yours? Better than just throwing them away. I will appreciate any feedback, tips or comments about this.
You will need US Art Quest paper perfect matte glue. Remove the backing paper from the rub on and lie it design side facing down on a hard surface. You should have the once-sticky backside of the design staring you in the face and reminding you of dollars lost. Now, dip a fingertip into the glue and gently dab a very thin layer onto the whole of the rub-on. Leave it face up till almost completely dry. It should feel just very slightly tacky to the touch. Now turn rub-on over and place it on your page (again - be prepared with some back up or cover up options if this does not work!!) and gently rub with an embossing stylus. At this point the design should stick to your page but as you can see mine was not perfect. Some bits of the rub-on just completely flaked away. Yet I was happy that I managed to get most of it on - the look is even more distressed than Fancy Pants intended it to be ... lol! I then used the same glue and my finger tip to put a thin layer on top as a sealant - just to make sure that it does not come off easily.
Bonne chance!!
Bonne chance!!
No comments:
Post a Comment